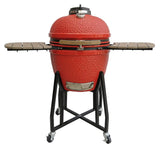

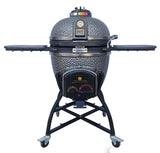
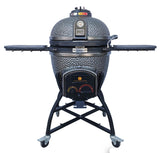


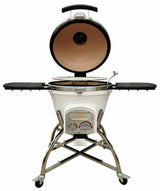

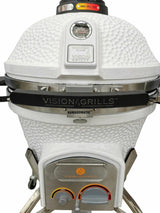


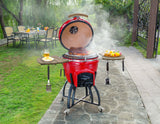


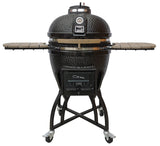
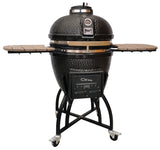


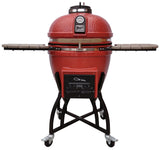

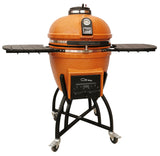
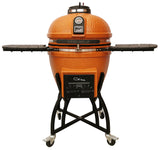


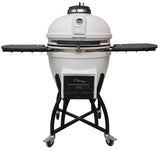
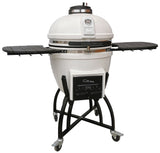


Vision Grill FAQs
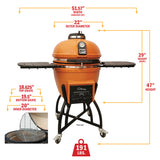
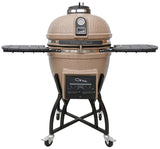
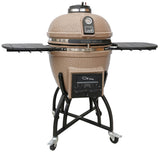
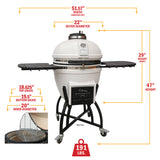
Refer to the setup guide included with your grill for assembly instructions or read our setup guides online.
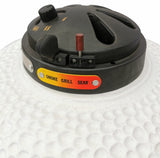
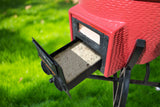
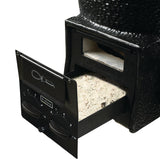
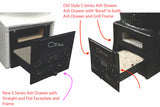
This is an error in your booklet. This part is not needed and does not come with the Professional S-Series grill. You may refer to the following question regarding that part.
The ceramic heat resistance plate packaged with the Classic B-Series grill was designed to minimize risk of the fire bowl cracking as the ceramic expands under extreme temperatures. While the ceramic heat resistance plate was intended to sit underneath the fire bowl to distribute heat, Vision Grills redesigned the fire bowl in 2010 with an expansion joint to eliminate the need for the ceramic heat resistance plate. This expansion joint gap runs from the top to bottom of the rear wall of the fire bowl, which allows for expansion of the ceramic at high temperatures without risk of cracking. This redesign rendered the ceramic heat resistance plate obsolete and you may dispose of it.
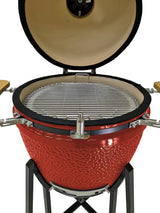
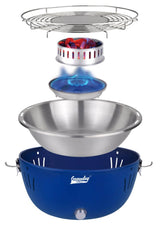
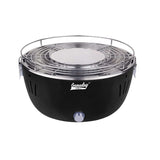
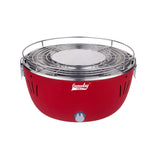
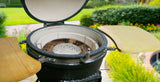
Each interior fire bowl, ceramic dome, and vessel is handmade and may have slight level variance. To accommodate for the possibility of the base of the vessel not being flush, Vision Grills designs each interior fire bowl with three raised feet. If your interior fire bowl does not sit flush, please slightly reposition it until it sits flush and no longer wobbles. Remember that the opening in the fire bowl will still need to face the front of the grill, with the vertical expansion joint in the rear. If repositioning of the interior fire bowl does not resolve the issue, please email help@visiongrills.com for additional solutions from our customer support team.
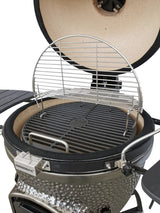
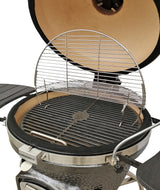
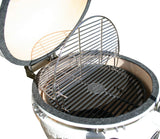
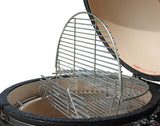
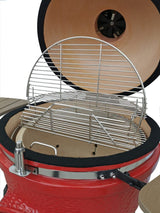
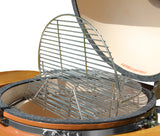
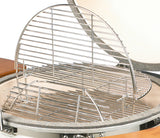
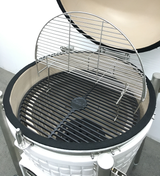
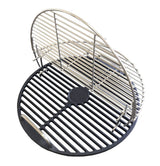
To install the 2nd tier cooking grate:
- Fold the 2nd tier cooking grate into a half moon shape.
- Slightly lift the back of the 1st tier cooking grate.
- Hold the folded 2nd tier grate perpendicular to the 1st tier cooking grate with the two “leg hooks” resting between the 3rd and 4th grate bar from the rear edge of the 1st tier cooking grate.
- Drop the 2nd tier grate forward until parallel with the 1st tier cooking grate.
Attaching the 2nd tier cooking grate can be tricky at first, but it has been designed to ensure a stable surface to eliminate the risk of tipping during use.
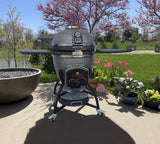
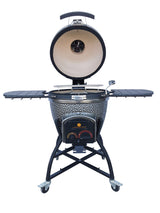
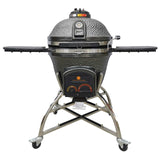
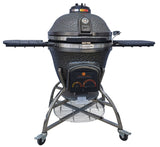
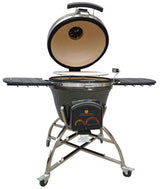
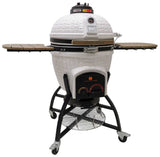
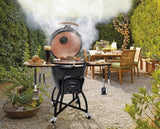
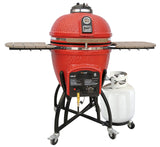
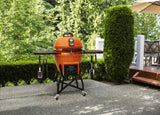
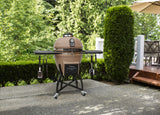
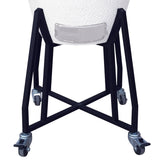
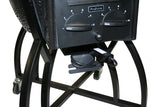
Moving the grill onto the cart requires two people. Do not attempt to move it alone.
- Assemble the cart completely, ensure casters are LOCKED, and position it next to the box.
- Carefully remove contents of the vessel, including the interior fire bowl, to reduce the vessel weight. Be very careful not to allow the vessel to tip over, as it can be very top-heavy when empty and open.
- Close the dome lid and open the sliding vent (Classic) or remove the ash drawer (Professional).
- Two people are required to lift the grill. Using the opening created by the sliding vent or ash drawer as one handle and the rear hinge as another handle, carefully lift the grill into the cart. Do not use the wooden handle to lift the grill, as it is connected only to the dome and not the vessel.
- Open the dome, carefully reinstall the fire bowl, and continue assembly of the grill.
Yes. The vertical gap (i.e., expansion joint) in the back of the interior fire bowl is an intentional design feature. This expansion joint allows the ceramic to expand and contract, reducing the risk of cracking the interior fire bowl during extreme temperature variation.
The vertical expansion joint sits opposite to the opening in the vessel. It is important that the opening in the fire bowl lines up with the bottom draft vent(s). The expansion joint will then be centered in the rear of the grill, while the opening of the fire bowl lines up with the lower ventilation.
Periodically, unglazed ceramic will have surface fractures. These appear as cracks, but will not affect the integrity or performance of the interior fire bowl. If any cracking migrates or the fire bowl breaks, please email a picture of the damage to the Vision Grills customer support team (help@visiongrills.com). To keep your fire bowl in the best condition possible, do not remove it after installation.
No. Many online resources suggest seasoning Kamado grills for 3-5 hours at low temperatures before using at more extreme temperatures. Since the process for constructing ceramic involves kilning at 2,400+oF, seasoning prior to use is not necessary to improve long-term performance. Many Kamado manufacturers suggest seasoning your grill during the first use to strengthen the gasket adhesive and prevent separation from the ceramic. Vision Grills uses high-quality adhesive for its gaskets, so your Vision Grill is fully operational immediately after assembly.
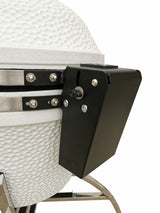
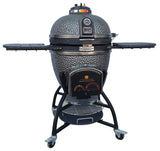
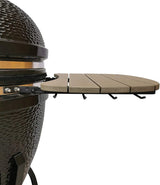
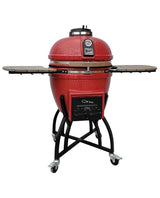
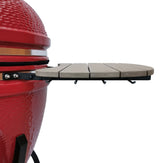
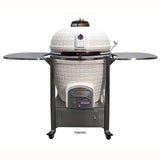
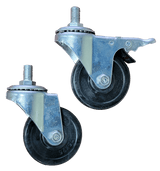
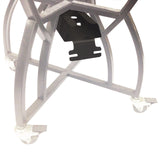
Each Vision Grills Kamado is hand-made, so variations in body size are not uncommon. We have designed our cart to accommodate these variations, though sometimes there is a small gap between the cart and the sides of the grill. If there is a sizeable gap between your grill and the cart or you feel your grill is not secure in the cart, please contact the Vision Grills customer support team (help@visiongrills.com).
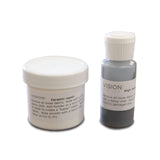
The blemish is purely cosmetic and will not affect the performance of the grill in any way. After ceramic parts are kilned at 2,400+oF, they are finished with high-temperature glaze followed by multi-step quality control testing. However, if any moisture is retained in the ceramic before application of the high-temperature glaze, there is a risk of this moisture surfacing after quality testing. This can cause the glaze to chip, creating a blemish on the exterior and exposing a small amount of ceramic. The blemish only occurs where moisture reached the surface and will not spread. If you discover any blemishes on your Vision Grill upon assembly, please email the customer support team (help@visiongrills.com) for an easy-to-apply repair kit. If you find the blemishes to be excessive, please email pictures of the damage tohelp@visiongrills.comfor additional solutions.
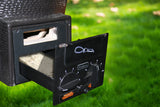
If you discover a missing part during assembly, please email the Vision Grills customer support team (help@visiongrills.com).
Should any parts be broken or cracked when delivered, please contact the Vision Grills customer support team (help@visiongrills.com) for replacement. Warranty claims require proof of purchase and a photo of the damaged part.
Should your gaskets burn or leak smoke during the first year of ownership, please email the Vision Grills customer support team (help@visiongrills.com) to request a replacement. The long-term performance of the original gasket will vary based on use of the grill. Consistent use of the Vision Grill at extreme (550+oF) temperatures may shorten the life of the gaskets. Keep in mind that the gaskets on your grill are like tires on a car and will require periodic replacement. All Vision Grills Kamados are equipped with FDA-approved felt gaskets attached with high-quality adhesive, however, the gaskets may become discolored and flatten due to heat exposure and drippings from foods and/or sauces over time. Discoloration or flattening will not affect the performance of your grill. In fact, the long-term smoke (creosote) buildup around the gasket actually helps the grill to seal and better retain heat. Vision Grills also offers an FDA-approved Nomex gasket upgrade for purchase (help@visiongrills.com). This will improve gasket longevity for high-usage owners.
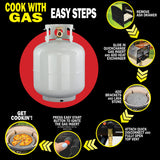
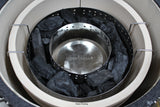
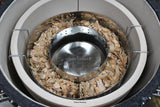
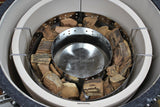
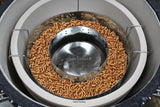
The most important factor in grill temperature is the amount of lit charcoal. There is no correlation between how much charcoal you put in the grill and temperature of the grill. To achieve maximum temperature, Vision Grills recommends filling the fire bowl an inch past the air holes located in the bottom third of the bowl with lump charcoal. Lump size will affect how long the charcoal burns, so you will need to experiment and become familiar with the amount of charcoal needed based on the length of time you will be grilling or smoking.
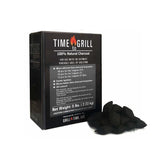
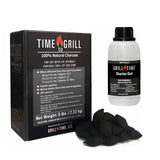
To achieve best results, lump charcoal is recommended for lighting ease, reuse, and longer and hotter burning. We recommend using Vision Grills 100% natural lump charcoal.
WARNING: DO NOT USE LIGHTER FLUID OR OTHER CHEMICALS TO IGNITE CHARCOAL. Ceramic grills will absorb these chemical smells and flavors.
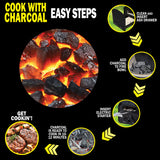
Great charcoal is fundamental to achieving grilling perfection and the charcoal you select will directly affect fire quality, temperature control, and flavor profile. Typically, briquettes are composed of sawdust compounded with additives, binders, and chemicals to promote lighting; whereas lump charcoal, the purest form of charcoal, is produced from chunks of hardwood.
Lump charcoal has no chemical additives and burns hotter than briquettes. It also delivers superior temperature control and the ability to create unique flavor profiles with availability in different wood types including: hickory, oak, mesquite, apple, and many others. While lump charcoal can cost up to 30% more than briquettes, it is important to know that less is required to achieve the same temperature as briquettes. Since lump charcoal extinguishes upon shutting down the grill, as opposed to briquettes, which burn fully during each grilling session, you will achieve 50-65% more burn time using lump charcoal.
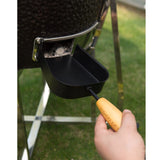
Yes, but only lump charcoal may be reused. After shutting down your Vision Grills Kamado, the remaining lump charcoal can be restarted. By doing this, you will use less lump charcoal compared to briquettes. Also, be sure to empty the residual ash from the grill between cooks to maintain proper airflow through the grill.
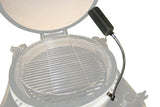
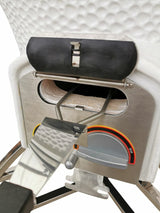
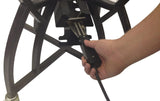
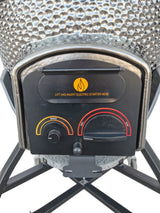
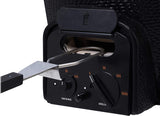
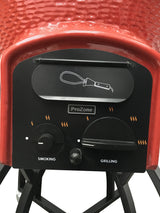
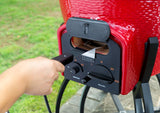
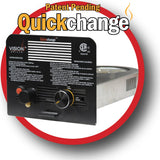
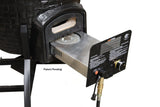
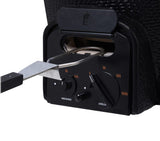
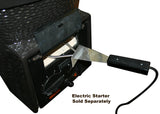
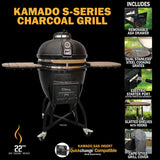
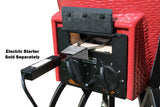
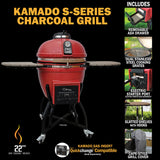
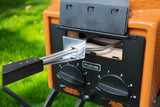
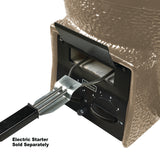
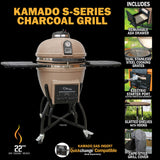
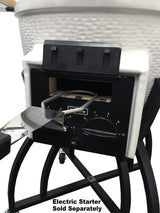
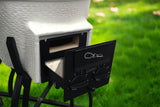
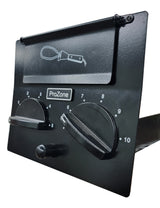
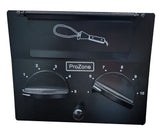
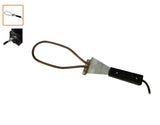
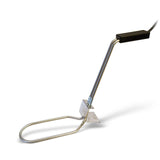
The Vision Grills Professional Series patent pending ProZone™ is equipped with an integrated electric starter port for quick lighting. Simply fill the interior fire bowl one inch above the air holes with lump charcoal, slide the heating element into the starter port, and plug in. Igniting from the bottom of the charcoal will promote quick and even ignition.
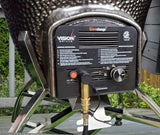
While the Vision Grills Classic B-Series is not designed with the integrated ProZone™, the same lighting efficiency and precision temperature control can be achieved with a few tips. Like the Vision Grills Professional Series, the key to quick charcoal ignition and an even burn is to ignite as close to the bottom of the charcoal as possible. Igniting the bottom of the charcoal on the Vision Grills Classic B-Series can be accomplished in several ways:
- Angled electric heating elements: designed to be placed at the bottom of the charcoal and plugged in, ignition should occur within 8-12 minutes
- Hand held torches: simply create a crater in the center of the charcoal, point the flame at several pieces of charcoal until glowing, then fold the surrounding charcoal on top of the ignited pieces
- Starter blocks: create a crater in the center of the charcoal, place lighter blocks in the center and ignite
- Chimney starter: stuff newspaper into the bottom of the chimney, place charcoal on top, and ignite the newspaper
NO. DO NOT USE LIGHTER FLUID to ignite charcoal for use in a Vision Grills Kamado. The ceramic construction promotes moisture retention and will absorb lighter fluid and its fumes, causing unsavory flavors and odors.
Yes, cut wood is an excellent fuel source for a Vision Grills Kamado. While lump charcoal delivers the highest performance, quickest ignition, and flexibility in temperature control, cut wood can also be used. It is important to use wood that has dried and cured sufficiently. Neither lighter fluid nor any other liquid accelerant should ever be used in a Vision Grills Kamado, as the ceramic may absorb undesirable odors and flavors.
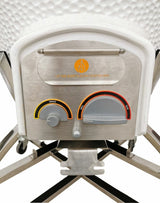
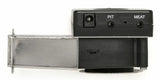
Vision Grills Kamados are designed with calibrated top and bottom draft vents to allow for superior temperature control. Closing down vents restricts airflow, which reduces available oxygen for the burn. To sear, open all vents to maximize the oxygen feed and burn temperature. Conversely, if you want to smoke for many hours, very little oxygen is needed to achieve a low-temperature burn. Controlling temperature will become easier as you gain experience using the grill. Truly the best part of being a visionary cooker is being in total control. Please refer to your Vision Grills owner’s manual for recommended settings for desired temperatures.
Please note: It is MUCH easier to raise the temperature than it is to lower it. Be careful not to get the fire too hot too quickly, as the temperature will not fall easily and you will have to wait to begin cooking.
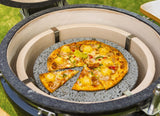
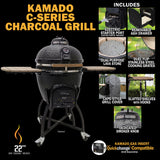
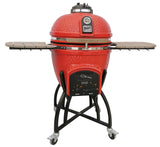
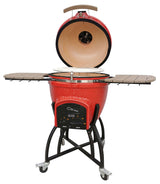
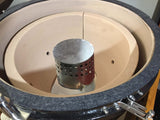
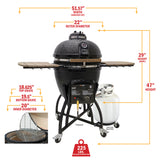
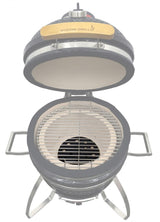
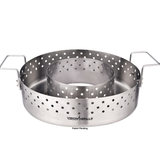
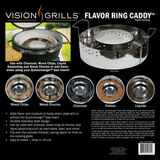
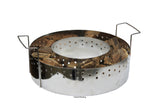
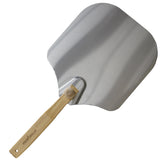
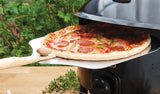
Vision Grills Kamados are designed for a full range of cooking perfection, including smoking, roasting, grilling, baking, and searing. For food requiring indirect heat, you will need a heat deflector to create a convection environment. Do this by installing the Vision Grills Lava Stone/Heat Deflector. This dual-purpose stone comes with a bracket to suspend the stone above the charcoal in the fire bowl for indirect heat. It can also be used directly on the cooking grates for wood and coal-fired pizzas, tandoor cooking, baking, and other stone cooking recipes.
After closing the vents when you are done with your grill, it is common for the grill to remain hot for at least 6 hours, as the ceramic construction provides superior heat retention. Unlike metal charcoal grills, it is easier to raise the temperature in a Vision Grills Kamado than reduce it. If you are planning on smoking or using other “low and slow” techniques, we advise setting the calibrated top and bottom draft vents to the desired temperature setting recommended in the owner’s manual. Allow the temperature of the grill to remain constant for 10-20 minutes before adding food. This will allow you to achieve the desired cooking temperature. The calibrated vents can be adjusted to raise and lower the temperature as desired.
The ceramic construction retains heat, which allows for consistent temperature control and a convection cooking environment. While Vision Grills Kamados are designed to extinguish lump charcoal when all draft vents are shut, the grill will remain hot for different lengths of time depending on the temperature achieved and length of grill time. It is recommended that the grill be allowed to sit uncovered for at least 6 hours before covering.
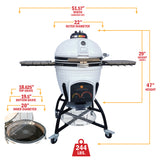
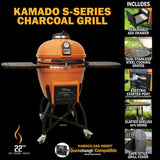
Vision Grills Kamados are designed for flexibility in maintaining 200-250oF for smoking, 275-350oF for grilling and roasting, as well as achieving 600+oF temperatures for searing and wood and coal-fired pizzas. This range of temperatures is achieved by how much lump charcoal you ignite, which is controlled by air drawn in from the bottom draft vent and out of the top vent.
To increase temperature, introduce more air flow by opening the bottom and top vents. This will cause the fire to spread. Do the opposite to reduce the temperature. To extinguish the flame, close both the bottom and top vents, cutting off airflow to the fire.
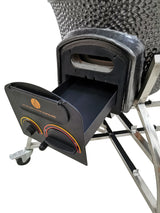
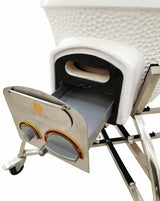
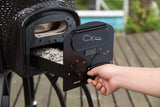
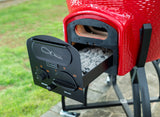
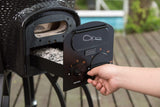
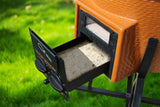
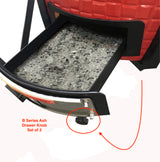
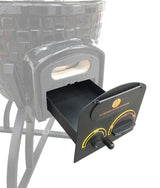
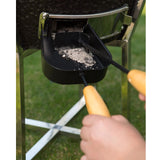
If you are unable to raise the temperature in your Vision Grills Kamado to the desired temperature, something is likely restricting the flow of air between the bottom and top vent. If this is the case, remove the cooking grate and inspect the bottom charcoal grate to ensure no residual ash or charcoal particles are blocking air flow. Additionally, check the ash drawer (Professional Series) or ash chamber (Classic Series) for excess ash buildup that may be restricting air flow. If these solutions do not resolve the issue, please email the Vision Grills customer support team (help@visiongrills.com) for additional assistance.
If only the center of your charcoal load is igniting, something is restricting the flow of air through the bottom draft vent. Remove the cooking grate and inspect the bottom charcoal grate to ensure no residual ash or charcoal particles are blocking air flow. Additionally, check the ash drawer (Professional Series) or ash chamber (Classic Series) for excess ash buildup that may be restricting air flow. If these solutions do not resolve the issue, please email the Vision Grills customer support team (help@visiongrills.com) for additional assistance.
The ceramic construction of a Vision Grills Kamado delivers a highly efficient burn rate due to the insulating and heat-retaining qualities of the ceramic.
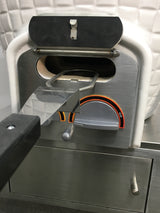
To achieve a low temperature for an extended period of time, you will want to be proactive rather than reactive in temperature control. Once the fuel is burning on its own, you should begin controlling the temperature. The top vent has a profound effect on temperature, so you will only want to have it slightly cracked. Set the bottom vent dials open to 1 / 6 (Pro Series) or the bottom draft vent to 2 (Classic Series). This will provide enough oxygen for the charcoal to remain lit and maintain a steady temperature. If the temperature stops rising before you hit the desired temperature, open the bottom vents a little more to allow the temperature to rise. You can also adjust the top vent, but a gentle touch is recommended.
While the temperature gauge will drop after opening the top dome, it should return to the previous temperature quickly after shutting the dome. Care should be taken when opening the top dome, however, as this will release heat contained in the grill.
It should be noted that opening the top dome introduces oxygen, which enters the bottom draft vent and exits through the top. This will cause the fire to spread if open for an extended period of time. For this reason, it is important that you minimize opening the top dome to maintain your desired temperature.
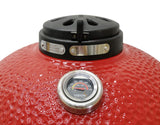
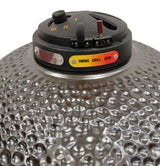
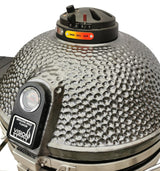
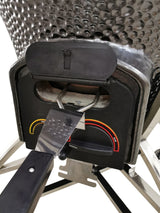
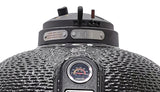
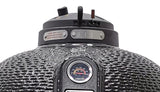
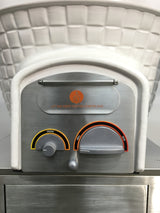
The top and bottom draft vents are calibrated to allow for precision temperature control. The Vision Grills owner’s manual provides recommended draft vent settings to achieve desired temperatures.
It should be noted that lump charcoal, recommended for use in your Vision Grills Kamado, is not uniform in size. Depending on the charcoal you select, slight variance from the vent settings recommended in the Vision Grills owner’s manual may be required.
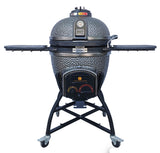
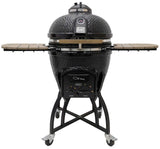
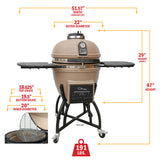
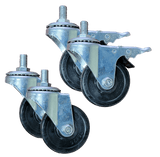
Vision Grills Kamados are constructed of high-quality ceramic with the thickest wall design in the industry, so a lot of weight is redistributed when opening the lid. To mitigate the risk of tipping, care must be taken when lifting the dome to install the fire bowl. There is a slight risk of tipping if the interior fire bowl is not installed, as it serves as a counterweight. However, with the fire bowl installed, there is a very low risk of tipping. For this reason, among others, we strongly recommend never removing the fire bowl from your Vision Grills Kamado. The cart with two locking casters also reduces movement and provides superior stability. For ease of lifting, the design team at Vision Grills incorporated two heavy-duty lid springs to deliver the lowest dome lift-weight in the industry.
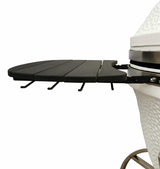
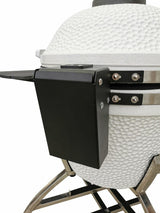
For Vision Grills Kamado owners who are experiencing difficulty with removing label adhesive, we recommend applying a solution of soap and water and scrubbing gently or using Goo Gone®. Scraping may cause damage to the side shelf. If the adhesive is not removable to your satisfaction, or damage occurs, please contact the Vision Grills customer support team (help@visiongrills.com) for replacement.
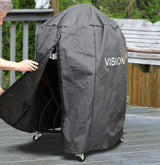
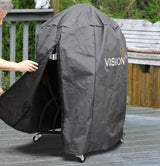
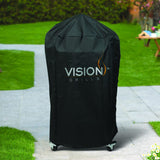
It is recommended that Vision Grills Kamados be covered when not in use to protect them from the elements and improve lifespan.
IMPORTANT: Wait until your grill is fully cooled before covering to prevent damage to the glaze and cover.
While covering your Vision Grills Kamado is recommended, you should allow the grill to fully cool before covering. Covering the grill when still hot/warm (particularly in extreme cold), can cause the ceramic to condensate. This causes the white powder formation on the exterior. If condensation occurs, simply wipe down the entire grill with a damp cloth and allow it to cool fully before covering in the future.
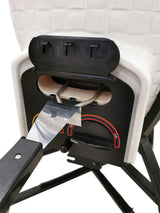
Remove old gaskets with a flat-edged scraper. Clean the rim of the base and lid with acetone (preferred) or rubbing alcohol. If necessary, soak any remaining gasket material with acetone and scrape away. Let dry for at least 30 minutes; the surface must be totally clean for the new gasket to adhere.
NOTE: Do NOT remove the dome lid to remove or replace gaskets.
No. The lid does not need to be removed to replace the gaskets.
Start by removing a small section of paper from back of the felt strip to expose the adhesive. Press the gasket firmly down onto the rim removing paper as needed. Bend the gasket around the rim as you press down, being careful not to let the gasket material hang over the inside edge of the rim. Do not stretch the gasket. Trim any excess material. If your gasket should detach, you can glue it back on with any common household adhesive.
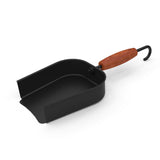
No. We strongly recommend against removing the fire bowl to clean it. Due to the size and fragility of the fire bowl, it can be easily dropped and fractured (not covered under warranty). If you are looking for a more thorough clean, keep the fire bowl in the grill and use an ash rake or shop-vac to clean out the ash.
IMPORTANT: it is recommended that all Vision Grills Kamados be fully cooled before covering to prevent damage to the glaze.
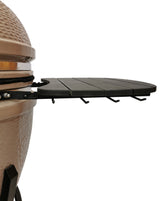
Vision Grills currently has several accessories and is actively working on the design of even more innovative ones for our line of Kamados. Please visit our accessories page to view our current stock. If you don’t see what you want, please let us know as we are always looking to develop new products to enhance your cooking experience.
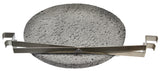
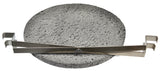
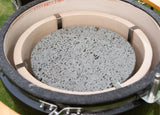
Vision Grills offers a versatile Lava Stone made of 100% natural volcanic stone. This diffuses heat during smoking in addition to serving as a stone cooking surface for vegetables, seafood, pizzas, and other small grill items.
Exposing the stone to quick temperature shifts may lead to the stone cracking. Please allow the stone to heat and cool with the grill.
Yes. To season the Lava Stone, heat it to operating temperature and brush each side of the stone with virgin olive oil. NOTE: The stone will be hot, so use protective wear and/or tools to carefully flip the stone. Do not get the olive oil on the hot coals; this will create a flare up. After the first use, the stone will naturally season itself with the oils from your cooking.
To cook on the Lava Stone, light grill normally and place stone on the 1stor 2ndtier cooking grate. Once your grill has reached the desired temperature, place food directly on cooking stone.
To clean the Lava Stone, flip it after each use. This allows the grill to burn off the remains after each use. Lightly clean of the top of the stone with a wire brush before placing food on the stone.
NOTE: Do not clean with soap.
To use the stone as a heat deflector for indirect heat cooking (smoking), remove the 1sttier cooking grate then unfold and install the Lava Stone bracket onto interior fire bowl. Lower the Lava Stone into the bracket and replace 1st tier cooking grate. Light grill normally and place food onto the cooking grate once you have achieved the desired temperature. Be sure that the stone heats and cools slowly, with the grill.
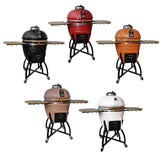
Our mission is to deliver a high-value Kamado grilling experience at reasonable prices for all consumers. The Vision Grills executive team has over 50 years of experience in product design and development for several Fortune 500 brands, specifically in delivering high-value products with exceptional quality for less. Vision Grills maintains its own factories where our teams are dedicated solely to hand-crafting each grill with care and quality for your enjoyment.
Vision Grills does not sell directly to consumers. Vision Grills Kamados are available at major retailers throughout the United States, Canada, Australia, Mexico, and other countries. Please visit our retailers page to locate a retailer near you.
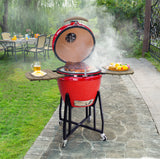
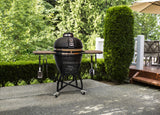
Absolutely. Year-round grilling is a key feature of Kamado cooking! Unlike metal barbeque grills, the ceramic construction of Vision Grills Kamados provides superior heat retention and consistency even in temperatures well below freezing.
Yes. The ceramic construction of our grills allow users the flexibility to sear, grill, smoke, and bake. Refer to the Vision Grills owner’s manual for draft vent calibration settings for your desired cooking need.
Yes. The flavor and aroma from your Vision Grills Kamado can be enhanced by the use of flavored wood chips. To achieve the highest quality flavor, soak a ½ cup of wood chips in water for 30 minutes before grilling. Lift the hinged grate to add wood chips after charcoal is ignited. We recommend using wood from fruit bearing trees (cherry, pecan, apple, peach, etc.) when cooking “low and slow.” If you want to infuse a smoky flavor while grilling things like steaks or beer can chicken, we recommend using hickory, mesquite, or other hardwood chips.